
How to Play RIG Riot
Boosters, energy, weight capacity, raid modes, and combat habits that keep a RIG alive.
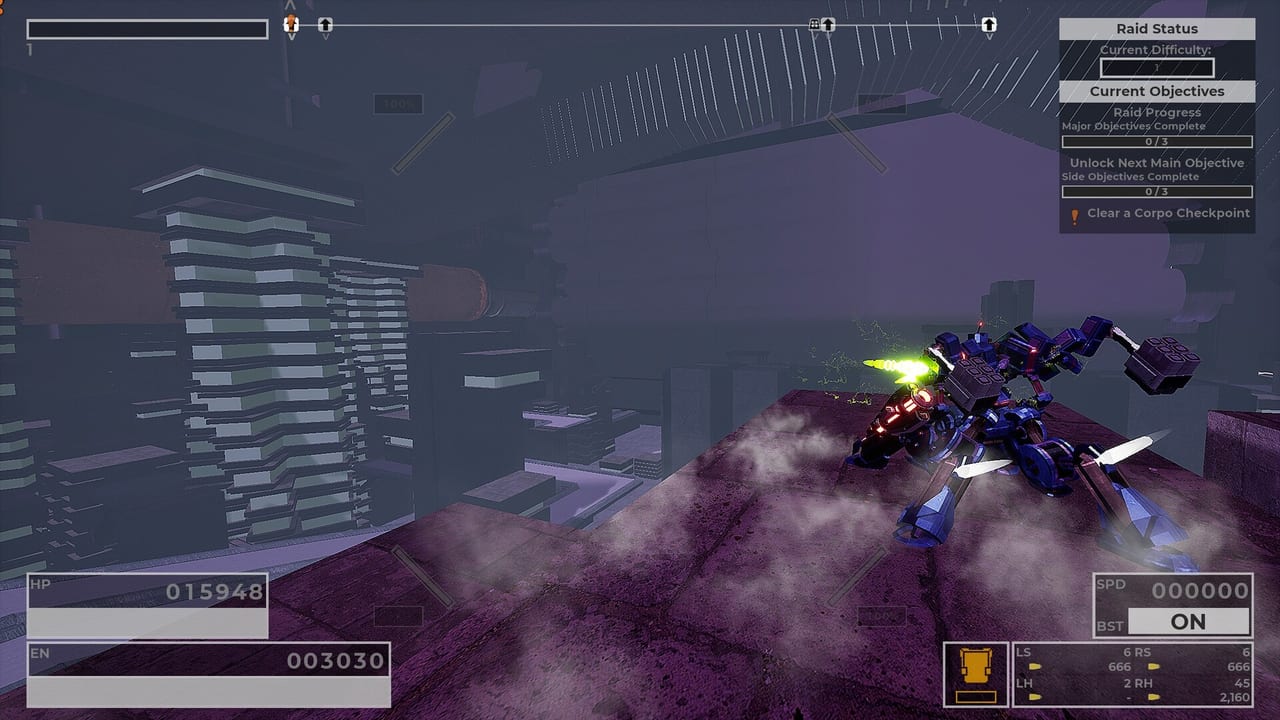
This page is for pilots who already finished the tutorial pop-ups and still die to energy starvation, weight mistakes, or a transport fight they started too early. It is a combat and loop manual, not a first-install briefing. If you have not opened the Armory yet, start with getting started and come back once you can read HP, EN, and BST ON without hunting the HUD.
RIG Riot plays as a third-person mech shooter wrapped around a roguelike raid. You load a starter from the Armory, drop into a megastructure stage, complete objectives, spend encryption tokens on chests, then activate a transport that summons a boss. Between runs you keep parts. During a run you keep whatever weapons and Volatile Mods you can actually carry. The weapons and Volatile Mods guide covers loot choices; this page covers how to move, when to fight, and how Mission differs from Assault.
Movement, energy, and the HUD
Boosters can be toggled on or off. Dash and turbo boost are panic buttons. Hold jump in the air for flight boost. Wall kicks are how you leave a bad elevation without burning a full flight bar. Energy (EN) fuels all of that. The HUD also shows HP, SPD, BST ON, and ammo as LS / RS / LH / RH so you can see which mount is dry.
Treat EN like stamina that also pays for positioning. A July 2026 demo update made turbo startup cheaper and scaled cost with dash duration instead of weighting mass so heavily. Empty EN in the open is still how missile drones pin you. Downward dash boosts were tripled in power; use a slam to rejoin a fight, not to tour the map. Enemy shot leading cares more about unpredictability than raw SPD — a straight flight line is not evasion. Handheld stick throw changes the same habits; see the Steam Deck notes.
Weight versus weapon capacity is the other silent killer. Light, medium, and heavy weapons all consume a budget. A heavy that looks free can freeze your boost profile. Dual-wielding a second copy requires selecting a valid open slot before you pick the upgrade. Map binds on the controls reference first. A setting exists to fire semi-automatic guns as if they were automatic; turn it on for cadence, not because you missed a trigger bind.
Watch this next: a full raid in motion
The full gameplay capture is the fastest way to see boost, objective beacons, and a transport fight without pausing every ten seconds. Watch how the pilot spends EN between objectives, then come back and apply the Mission versus Assault split below.
Mission versus Assault, then the transport
Mission mode has no endlessly respawning patrol enemies and scales with objectives completed. Assault respawns patrols and climbs with time. Mission is the classroom. Assault is the pressure cooker for mods that need bodies.
Raid Status shows Current Difficulty, Major Objectives 0/3, and Side Objectives 0/3. The first major is easier; later ones come from pools based on majors finished. Side work funds tokens and safer routes, but it does not replace majors.
Activating the transport summons a boss — an enemy RIG or a non-RIG threat. Shot Caller is the lightweight dual-gun RIG example from Devlog 0. Trigger the fight because your statuses, six-mod board, and EN habits can survive it. Objective types live in the raids and objectives guide.
Level-ups offer weapons, Volatile Mods, or instant consumables (health, ammo, Scrap). A new gun comes first, then upgrades that alternate stats and augment slots. Mods work the same way: efficacy, then RIG stats. A short invincibility window after you close the menu is for boosting out, not for reading tooltips in the open.
Combat habits that actually stick
Keep boosters on while you learn. Charged status procs also deplete 10% of the target’s energy, so status weapons are anti-boost tools. Two statuses on one weapon combine into a unique stronger status; protect that gun.
Melee is hold-and-release with optional auto-lunge. Kick damage scales with overall upgrade level. Fire Demon’s gatling base damage per projectile was cut from 210 to 60 in July 2026 — do not copy old clip numbers. Ammo starvation on large enemies is real: keep two ammo pools, and open chests only when you can afford the token and the weight.
For ranking context after a few raids, skim the weapon tier list. Rankings are patch opinions, not a substitute for capacity math.
Next steps after you can stay airborne
Once boost, EN, and the HUD are muscle memory, run Mission until you can finish three majors without panic-activating the transport. Then read the raids and objectives guide for camp, fortification, and Arena Foe specifics. If loot choices are the part that still feels random, open the weapons and Volatile Mods guide and practice one six-mod board instead of rerolling your whole identity every chest.
Frequently Asked Questions
Quick answers to the most common RIG Riot questions.
What do HP, EN, SPD, and BST ON mean on the HUD?
Hit points, energy for boosting, speed, and whether boosters are toggled on. Ammo is split across LS / RS / LH / RH. Bind labels live on the controls reference.
Should I play Mission or Assault while learning?
Mission. It has no endlessly respawning patrols and scales with objectives completed. Assault is the timed pressure mode. Route details are in the raids and objectives guide.
Why does my RIG feel stuck after I pick a heavy weapon?
Weapon capacity is weight-based. A heavy can eat the budget that your boosters wanted. Check capacity notes in the weapons and Volatile Mods guide before you lock the upgrade.
When do I activate the transport?
When your current guns and six-mod board can contest a boss, not at first sight. The transport fight is the raid closer. New pilots should still keep the getting started checklist nearby.
Does RIG Riot work on Steam Deck?
Steam lists it as Steam Deck Playable, with full controller support. Read the Steam Deck notes for handheld-specific HUD and bind advice.